OpenClaw is a personal AI assistant running locally, integrating with messaging platforms for control.
Prerequisites
- A MiniMax Subscription Key with Token Plan or Credits access
- A computer with terminal access (macOS, Linux, or Windows with WSL)
Install and Configure OpenClaw
1
Run Installation Command
Run the installation command in your terminal:You’ll see this entry page:
2
Start Setup
Select “Yes” .
3
Select QuickStart Mode
Select “QuickStart” to use the guided setup.
4
Select Model Provider
Select “MiniMax” as the model provider.
5
Select Auth Method
Select “MiniMax Global — OAuth (minimax.io)” as the authentication method.
6
Sign In to MiniMax
You’ll be sent to a browser window to sign in to or sign up for your MiniMax API Platform account.
7
Authorize OpenClaw
Select “Authorize”, after which you can return to the terminal.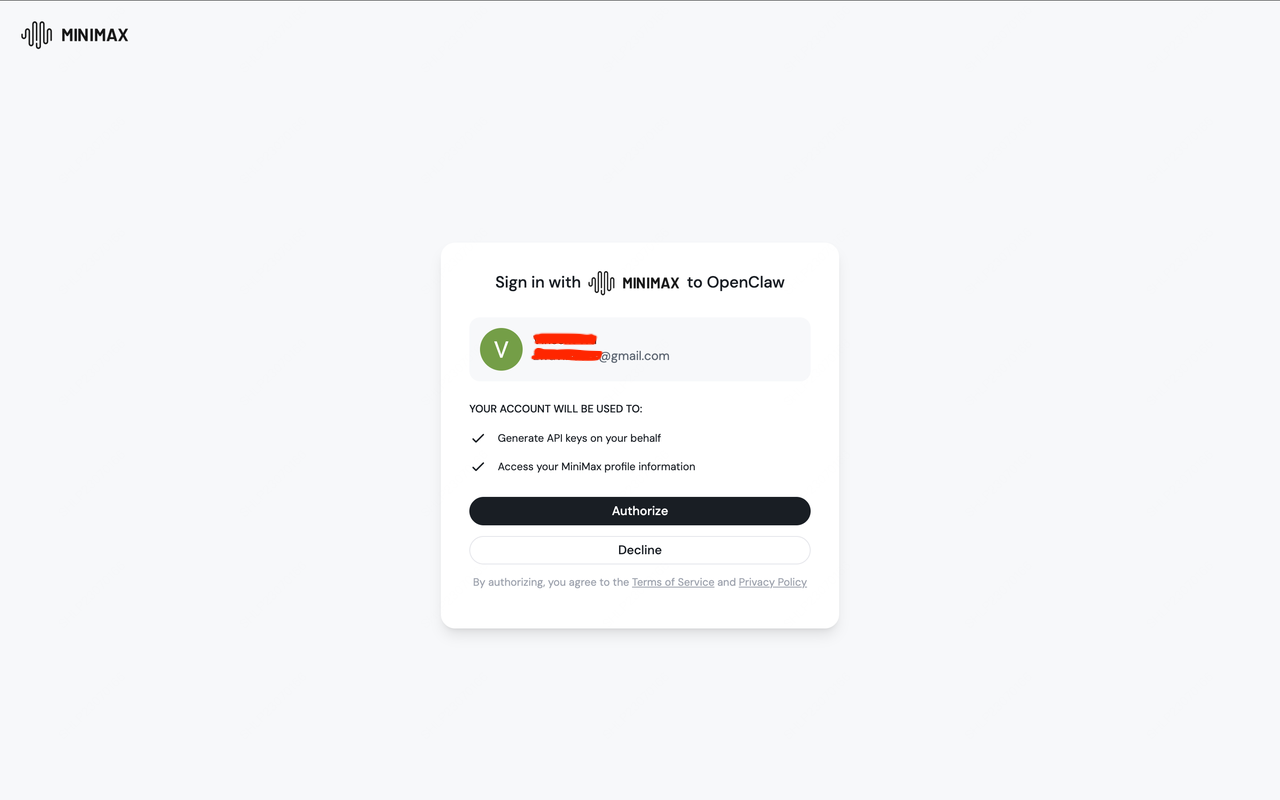
8
Confirm Model Selection
A model picker will appear with the available models already selected. Press Enter to continue.
9
Select a Messaging Channel
Back in the terminal, select a messaging channel to connect. OpenClaw supports a range of platforms including Telegram, WhatsApp, Discord, iMessage, and more.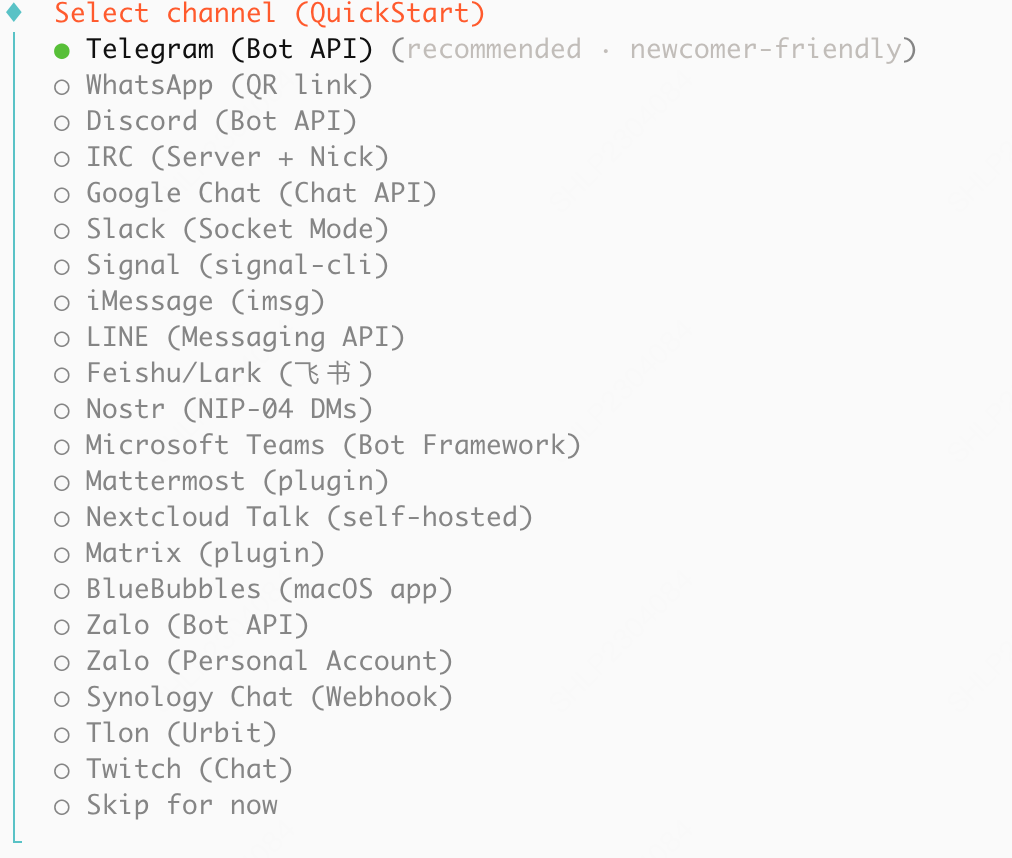
10
Confirm Installation
Follow the prompts for your chosen channel, then select “Yes” when asked to confirm.
11
Select Skills
Select any additional skills you wish to install (press space to select, up and down arrows to navigate).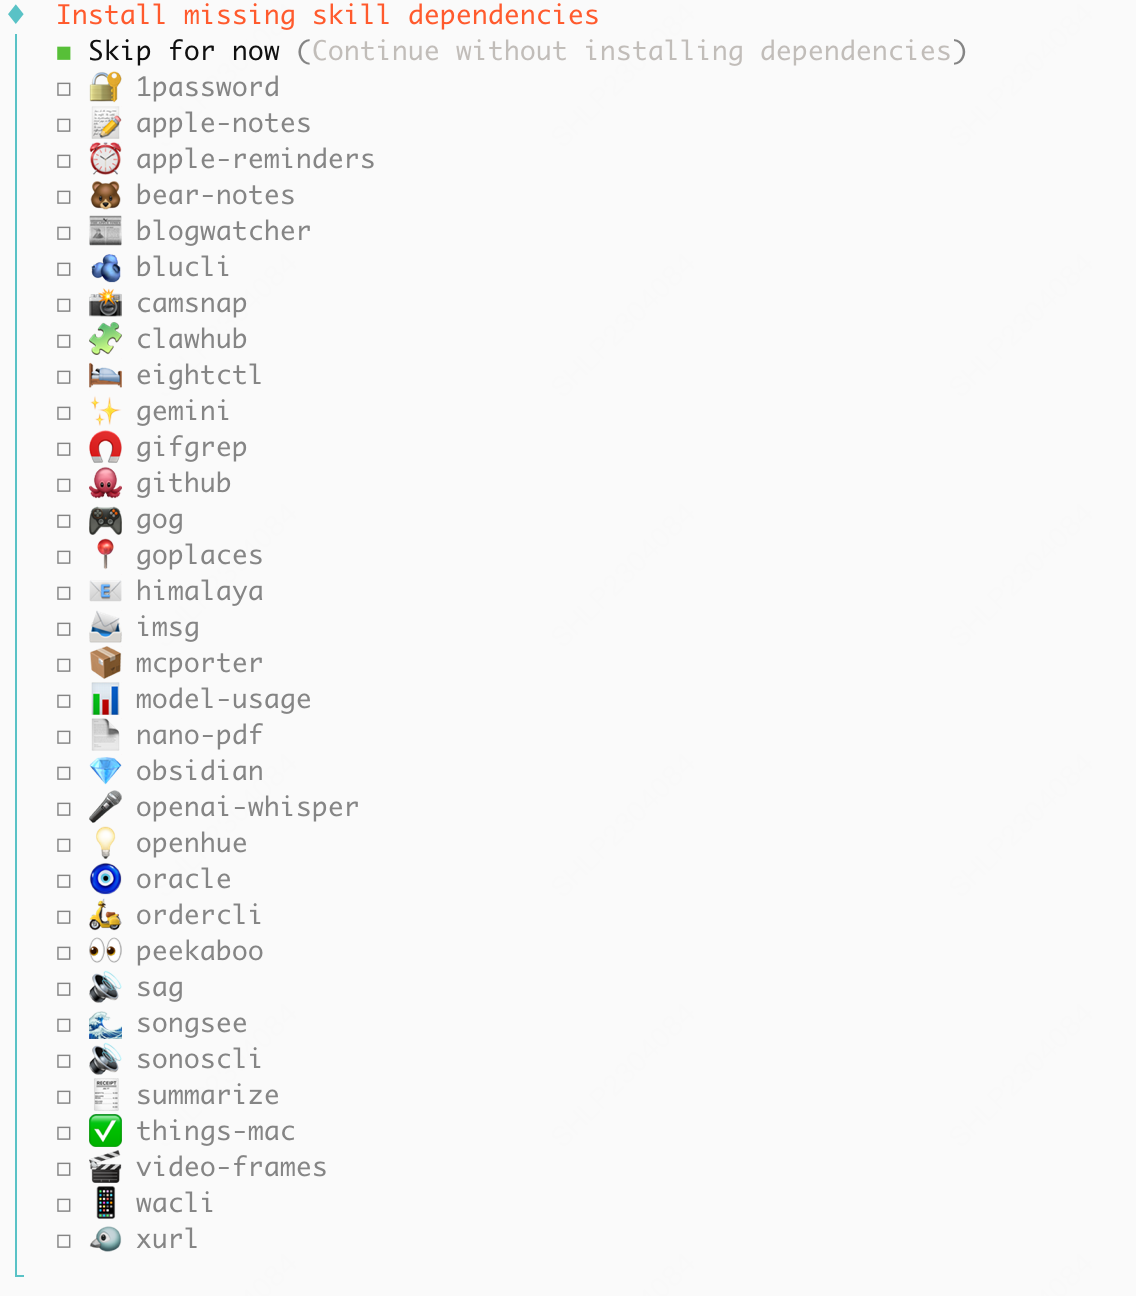
12
Configure API Keys
Configure additional API Keys for tools that OpenClaw can use (optional). Select “Skip for now” if you don’t need additional tools.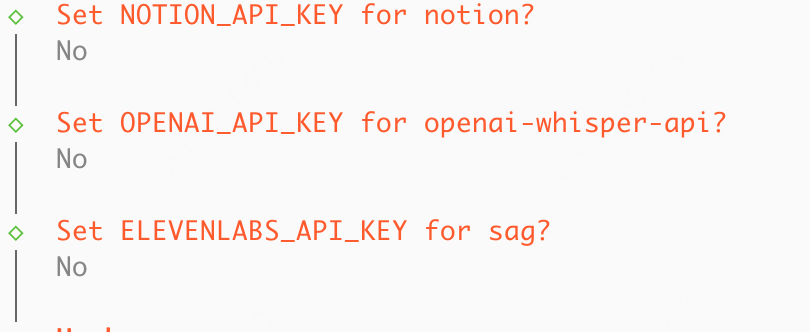
13
Open Web UI
Select “Open the Web UI” to access the OpenClaw dashboard.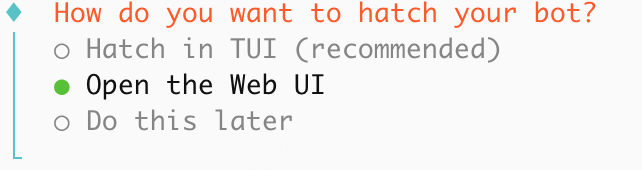
Toggle thinking
Toggle thinking at runtime with/think: off turns it off, adaptive (the default) lets M3 decide when to think.
Advanced Capabilities
Image Understanding
- Method 1 (Recommended): MiniMax CLI
- Method 2: Token Plan MCP
MiniMax CLI (the
mmx command) is the official multi-modal command-line tool. Once installed, OpenClaw can invoke mmx vision for image understanding — and you get the same CLI for language, image, video, speech, music, and search (7 multi-modal capabilities).1
Prepare Environment
Make sure Node.js 18+ is available:
2
Install MiniMax CLI
Run the following command in your terminal for a global install:⭐️ Or hand install, login, and SKILL setup to OpenClaw in one go (replace
sk-xxxxx with your actual key):3
Login with API Key
Authenticate with your API Key (replace The latest mmx-cli auto-detects your service region from the Key — no manual region setup is usually needed.Once logged in, run
sk-xxxxx with your own Key):The region follows the platform where your API service was purchased:
cn for the MiniMax China Token Plan, or global for the MiniMax International Token Plan.mmx quota to view your Token Plan balance and confirm the setup is working.4
Install SKILL (Optional, Recommended for Agent Users)
If you’ll be invoking
mmx from inside OpenClaw, we recommend adding the official SKILL.md so the agent makes better tool calls without having to read --help on the fly:5
Tell OpenClaw to Use mmx vision
Tell OpenClaw to prefer
mmx vision for any future image understanding:6
Verify
Send an image in OpenClaw and check that it auto-invokes
mmx vision describe --image <path> and returns a correct description.Web Search
OpenClaw doesn’t ship with web search out of the box. Add it via one of the methods below (Token Plan subscribers, API Key starts withsk-cp).
- Method 1 (Recommended): MiniMax CLI
- Method 2: Token Plan MCP
mmx search is the web-search command from MiniMax CLI. No separate MCP server process — OpenClaw invokes it directly via Bash.1
Prepare Environment
Make sure Node.js 18+ is available:
2
Install MiniMax CLI
Run the following command in your terminal for a global install:⭐️ Or hand install, login, and SKILL setup to OpenClaw in one go (replace
sk-xxxxx with your actual key):3
Login with API Key
Authenticate with your API Key (replace The latest mmx-cli auto-detects your service region from the Key — no manual region setup is usually needed.Once logged in, run
sk-xxxxx with your own Key):The region follows the platform where your API service was purchased:
cn for the MiniMax China Token Plan, or global for the MiniMax International Token Plan.mmx quota to view your Token Plan balance and confirm the setup is working.4
Install SKILL (Optional, Recommended for Agent Users)
If you’ll be invoking
mmx from inside OpenClaw, we recommend adding the official SKILL.md so the agent makes better tool calls without having to read --help on the fly:5
Tell OpenClaw to Use mmx search
mmx search offers two invocation forms:mmx search query --q "..." --output json via the Bash tool and hand the stdout JSON to the model directly — no MCP server process needed.6
Memorize